2.2.3. NS3 - Tutorial 1. Configure NetAnim
Give credits to The Motivated Engineer - NS3 Tutorial - Youtube
2.2.3.1. Prerequests
Before following this tutorial, you need to finish the following steps
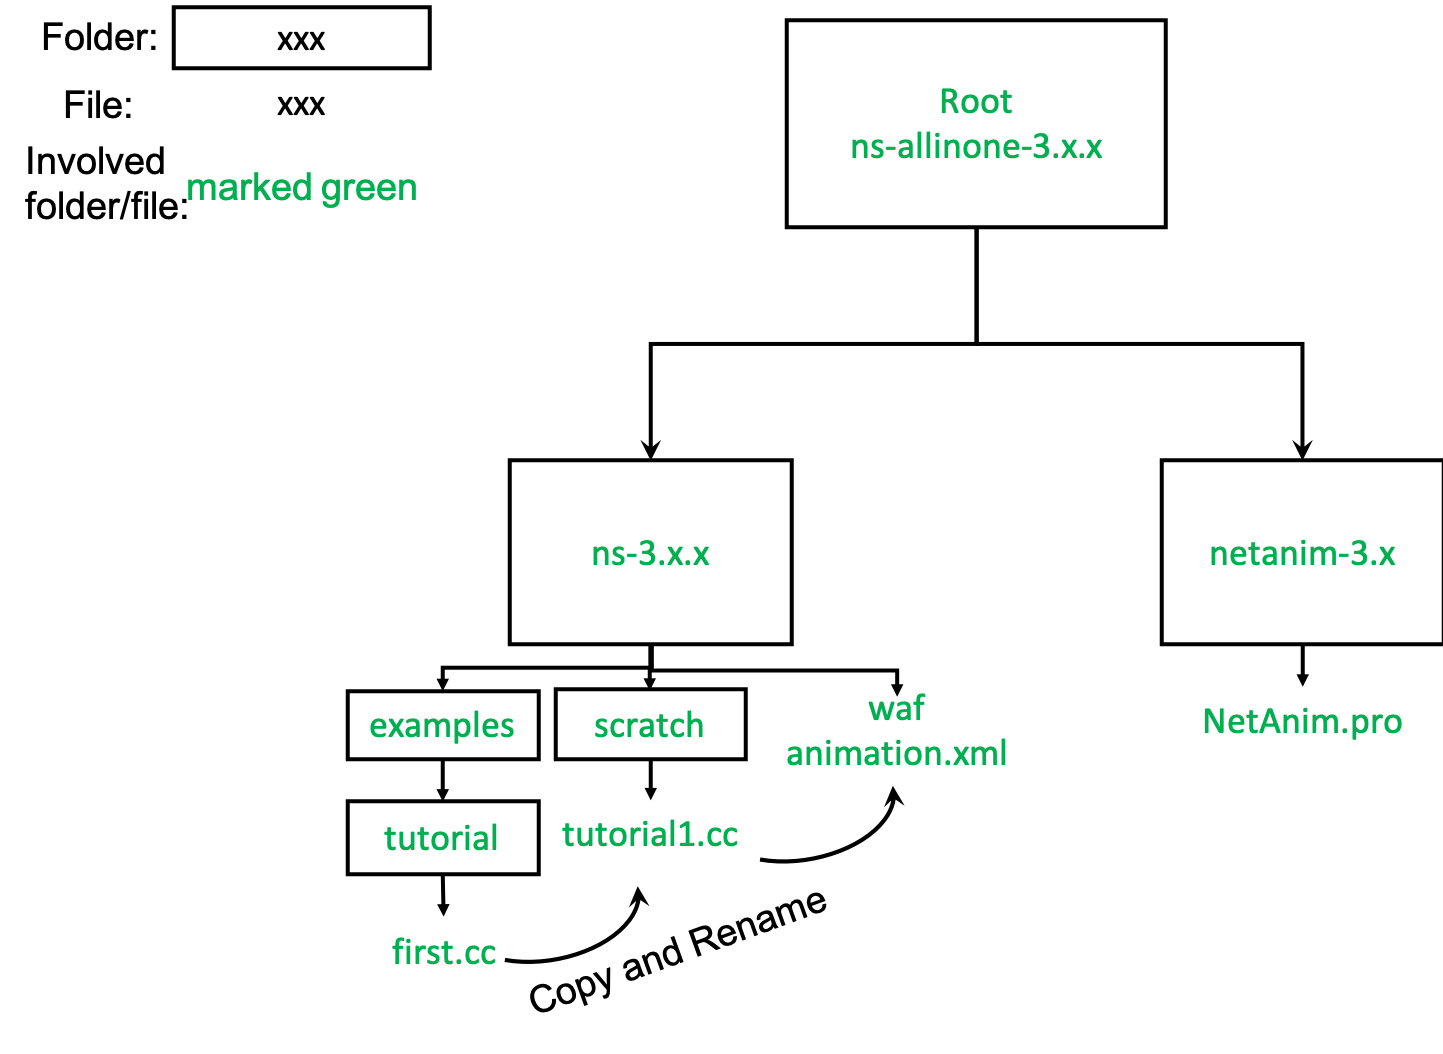
2.2.3.2. Related folders and files in this document
2.2.3.3. Configure NetAnim
# Go to NS3 All-in-one folder and go further into NetAnim folder
cd ns-allinone-3.30.1/netanim-3.108/

#
sudo apt-get install make -y

# clean the source code, qmake and then make
make clean
qmake NetAnim.pro
make
Now, NetAnim is ready to use.
2.2.3.4. Run Tutorial Examples
Pay attention to the name of the file
# go to ns3-30.1 examples
cd ..  # now we are at ns-allinone-3.30.1/
cd ns-3.30.1/examples/tutorial

# instead of ruining the example, we copy it to scratch/  Note that, you cannot change the folder unless you have configured the path
# Also, you should not reuse the name "first", because NS3 will find out first.cc or first.py instead of your file.
# here we use tutorial1.cc
cp first.cc ../../scratch/tutorial1.cc
cd ../../scratch/

# use your favourite code editor to edit the first.cc file.
# I use vscode.
2.2.3.5. Add Code for NetAnim
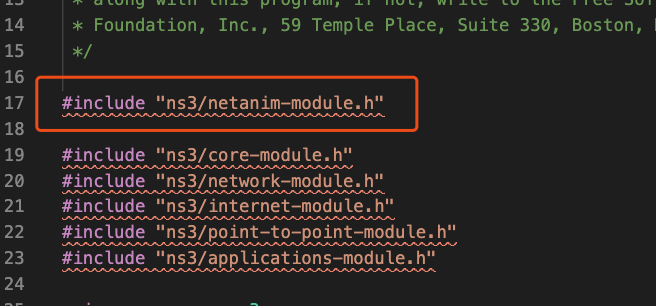
Add the header file
#include “ns3/netanim-module.h”
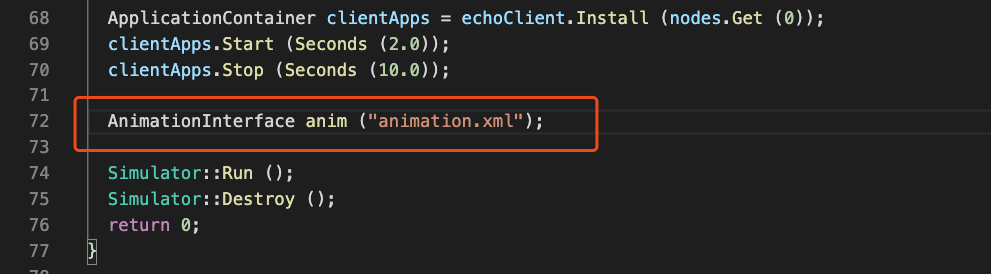
Add the following statement before Simulation::Run()
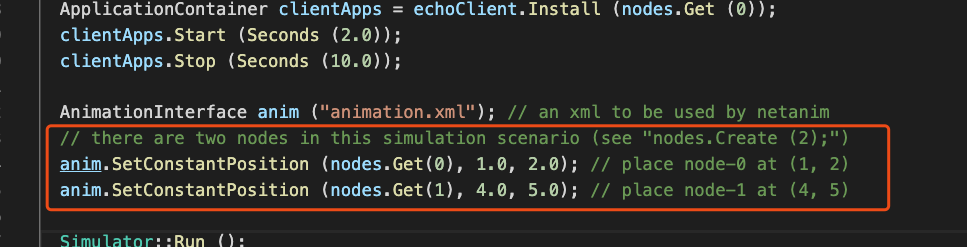
AnimationInterface anim (“animation.xml”);
Set give positions to your nodes.
anim.SetConstantPosition (node, double x, double y);
2.2.3.6. Build and Run
# go back to ns-3.30.1
cd ../
# use waf to compile and run the code
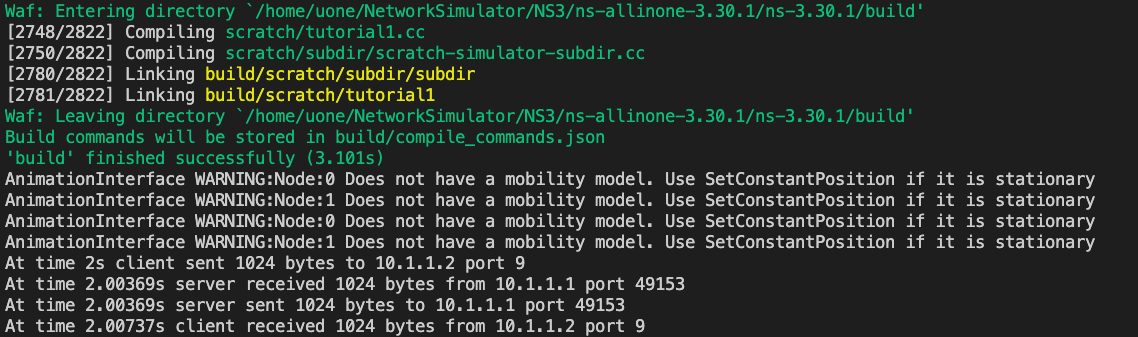
./waf --run tutorial1
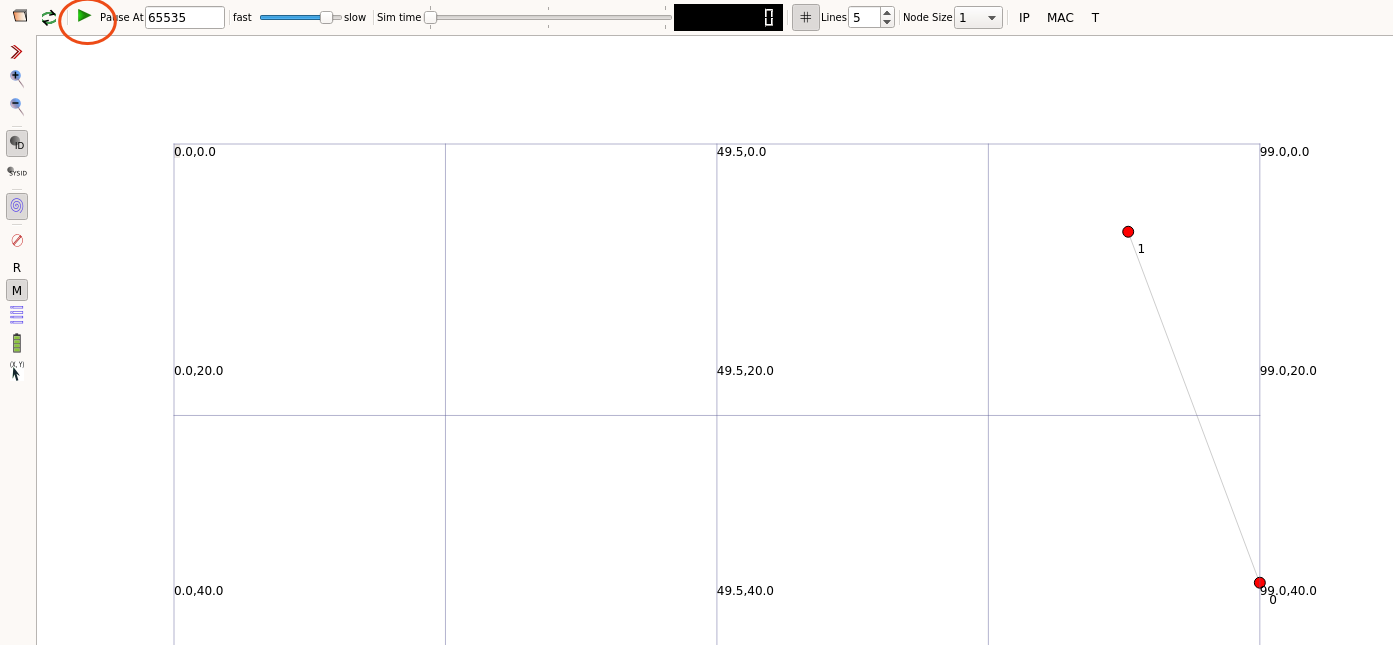
You should see
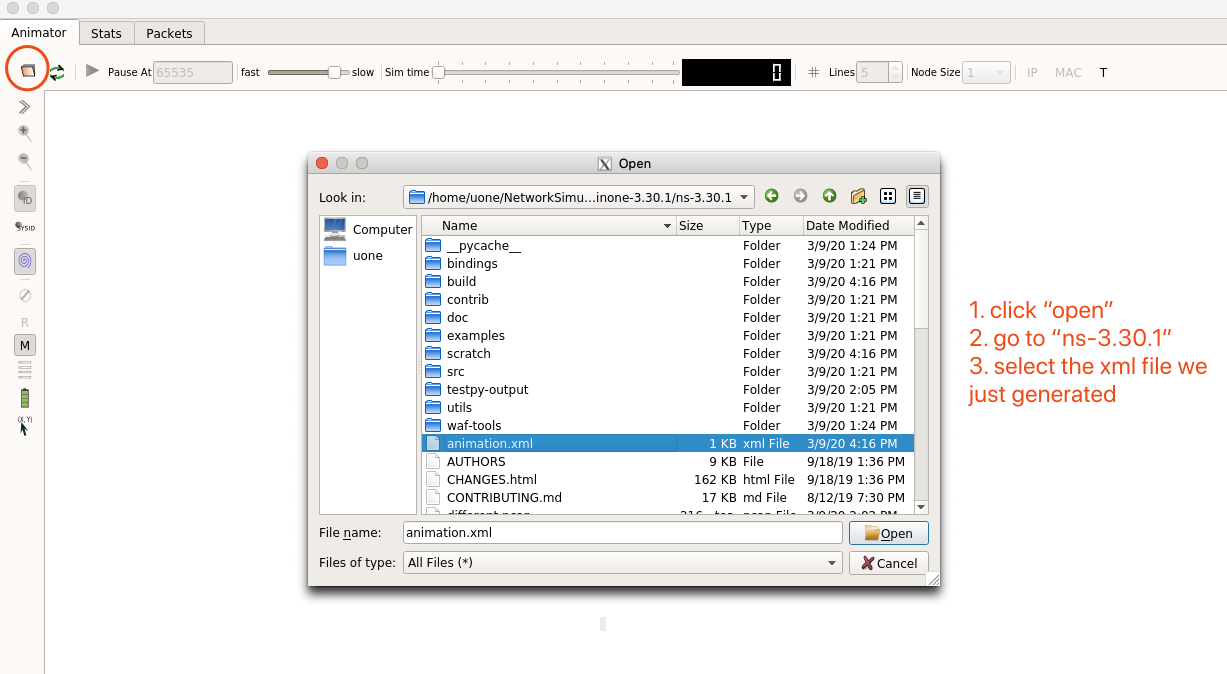
2.2.3.7. Use NetAnim to Show The Animation
# go to netanim-3.108
cd ../netanim-3.108/

# run NetAnim
./NetAnim