2.2.2. NS3 Installation on MAC OS 10.15 & 11.1
I’m going to choose all-in-one package and install NS3 on MacOS 10.15 and 11.1
2.2.2.1. Steps
2.2.2.1.1. Requirements
Max OS 10.15
2.2.2.1.2. Install Prerequests
Install Homebrew following Homebrew
Install mercurial by
brew install mercurial
Python2 >= 2.7 and Python3 >= 3.4
2.2.2.1.3. Download the all-in-one package
The latest release of NS3 can be found via https://www.nsnam.org/ . Up to 03/09/20, the latest version is ns3.30.1 and the downloading link can be found via https://www.nsnam.org/releases/ns-3-30/ . The latest version till 01/25/21 is 3.33.1. The installation steps are identical to the description in this webpage.
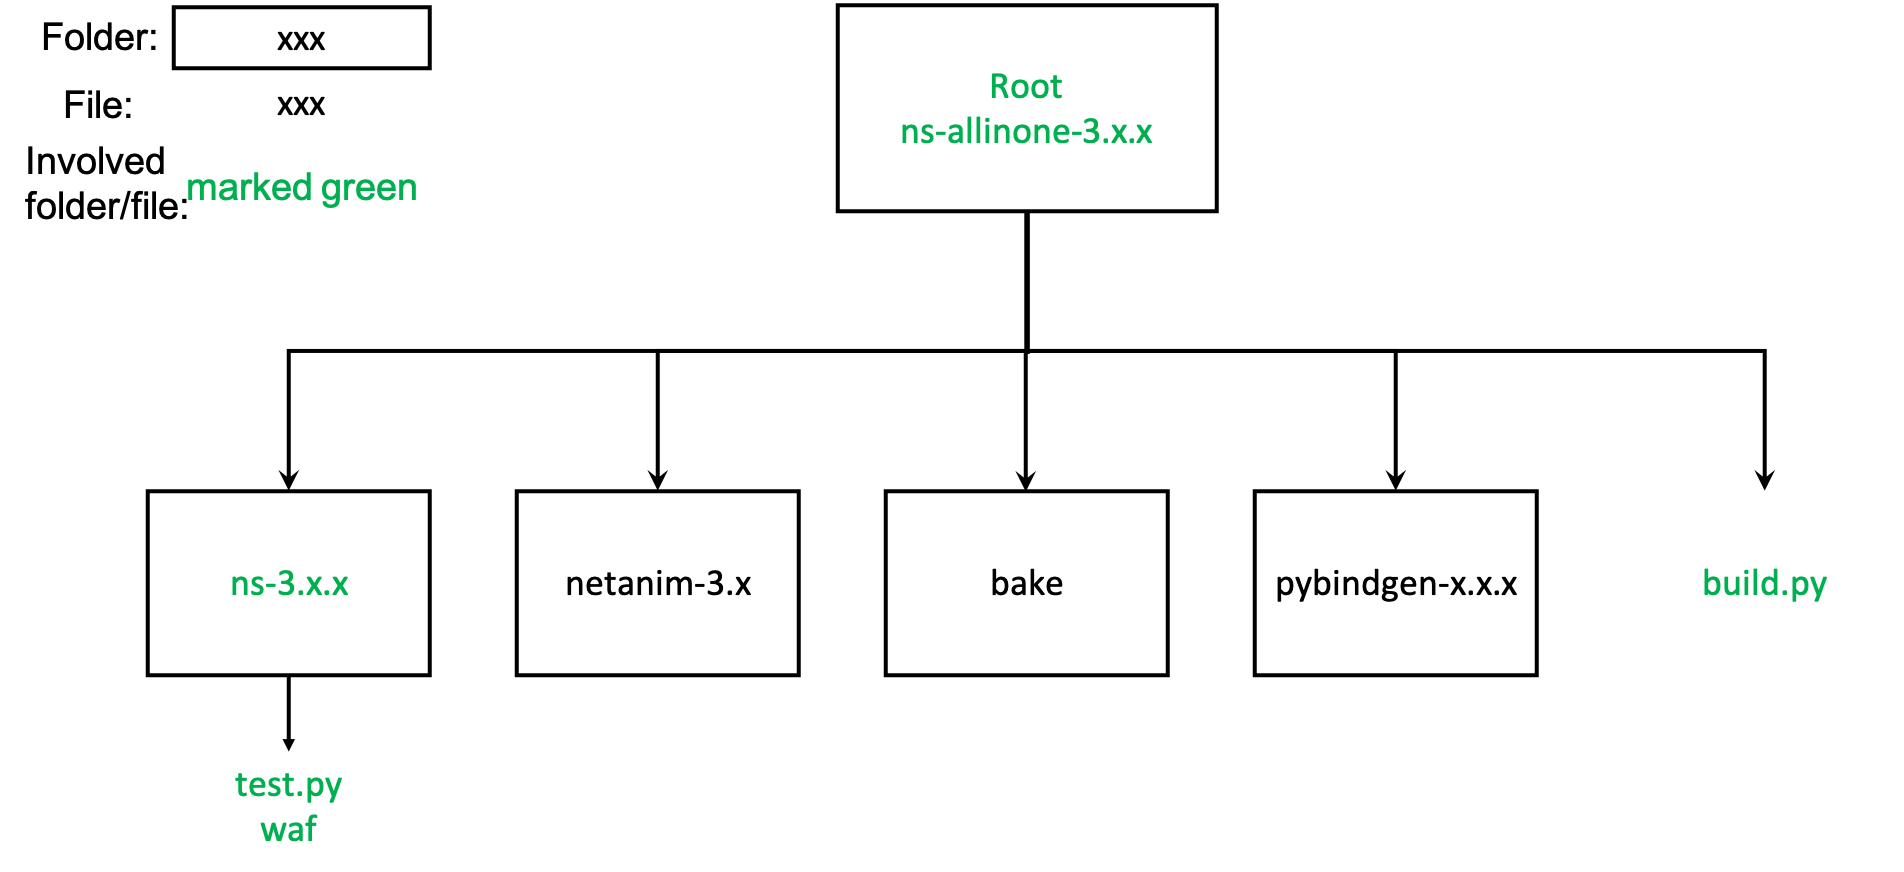
After success downloading, you receive a file named ns-allinone-3.30.1.tar.bz2.
Untar the file by either executing tar -xvf ns-allinone-3.30.1.tar.bz2 or right-click the file and select extract here.
2.2.2.1.4. Related folders and files in this document
2.2.2.1.5. Build NS3
Open a terminal, cd to the extracted folder and use the build.py to build.
$ cd ns-allinone-3.30.1/
ns-allinone-3.30.1$ ./build.py --enable-examples --enable-test  # the build.py file can be executed directly
You should be able to see lots of compiling messages and the compiling process may last as long as 30 minutes. The success message reads as
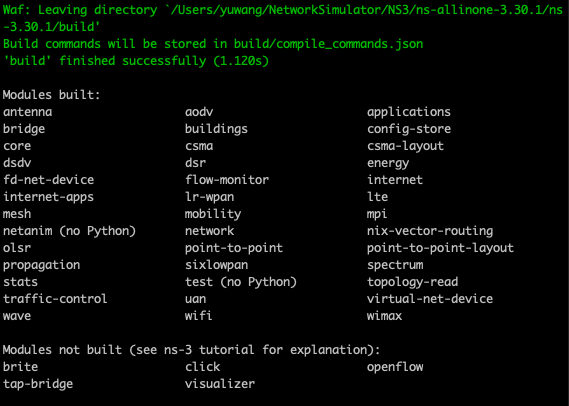
Note that, since not all functionalities are enabled/supported for MacOS, modules such as openflow and visualizer are not going to be compiled.
2.2.2.1.6. Configure NS3
Cd to ns-3 source code folder, configure NS3 and run batch test
ns-allinone-3.30.1$ cd ns-3.30.1/
ns-allinone-3.30.1/ns-3.30.1$ ./waf --build-profile=debug --enable-examples --enable-tests configure
ns-allinone-3.30.1/ns-3.30.1$ ./waf
ns-allinone-3.30.1/ns-3.30.1$ ./test.py -c core
You are expected to see messages reading as “PASS XXXXXXXX”. Make sure that the module you are going to use doesn’t shown in crash list.
2.2.2.1.7. Hello-World Example
ns-allinone-3.30.1/ns-3.30.1$ ./waf --run hello-simulator
A success running message reads as

2.2.2.1.8. Add Additional Module After Build
Suppose you want to use another module, e.g. doxygen, you should follow the following way to let waf recognize the newly installed module.
# I install doxygen via brew.
brew install doxygen

# add doxygen to the configuration file.
# It will automatically compile involved modules/source codes
./waf configure doxygen

# use
./waf --doxygen